Network Rules in Snowflake
In today’s data-driven enterprises, securing access to cloud platforms like Snowflake is essential. One of the most powerful tools Snowflake provides for managing access is the Network Policy feature, which enables administrators to define IP-level restrictions. Whether you want to enforce access through a corporate VPN or block suspicious regions, configuring network rules in Snowflake ensures that only authorized IPs can interact with your data.
In this article, we’ll walk through everything you need to know about configuring network rules (network policies) in Snowflake, step-by-step.
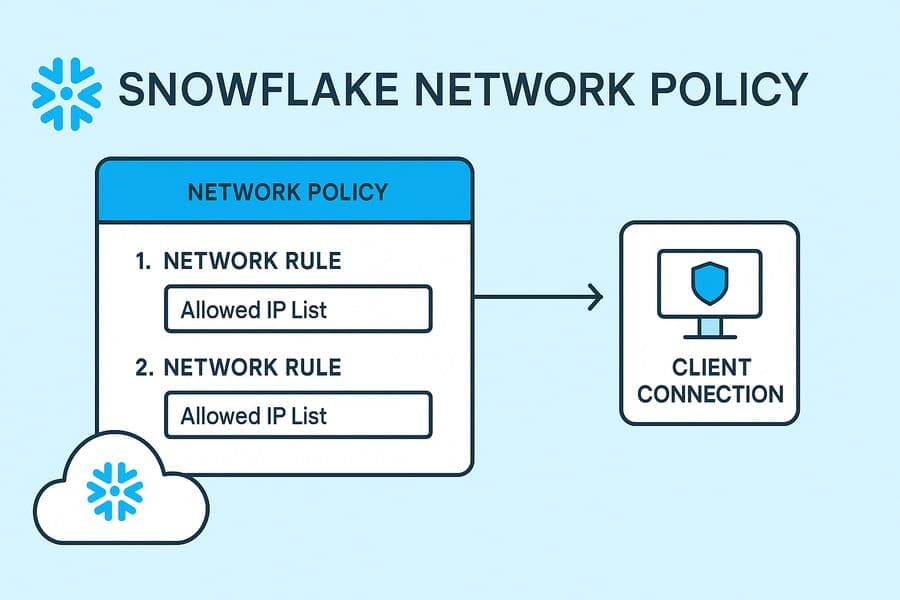
Network Policies in Snowflake are security controls that allow you to:
- Whitelist specific IPs or IP ranges (
ALLOWED_IP_LIST) - Blacklist specific IPs or IP ranges (
BLOCKED_IP_LIST) - Apply restrictions at the user level or account-wide
These policies help ensure that only clients from trusted IP addresses can connect to your Snowflake instance—via the UI, JDBC, ODBC, SnowSQL, or REST API.
Before you begin:
- You must have the ACCOUNTADMIN role or a role with the
CREATE NETWORK POLICYprivilege. - IPs used in policies must be public IP addresses (no internal/private IPs like
192.168.x.x). - Ensure you include your current IP to avoid locking yourself out.
Start by creating a named policy with one or more allowed IP addresses and optional blocked IPs.
CREATE NETWORK POLICY office_policy
  ALLOWED_IP_LIST = ('203.0.113.0/24', '198.51.100.12')
  BLOCKED_IP_LIST = ('192.0.2.0/24');
✅ Tip: Use CIDR notation to allow an entire range (e.g., a corporate VPN pool).
To test the policy safely, apply it to just one user first.
ALTER USER jdoe SET NETWORK_POLICY = office_policy;Later, to remove it:
ALTER USER jdoe UNSET NETWORK_POLICY;This lets you test access and behavior before affecting the entire account.
Once tested, you can apply the policy to all users and services under your Snowflake account:
ALTER ACCOUNT SET NETWORK_POLICY = office_policy;To remove a global policy:
ALTER ACCOUNT UNSET NETWORK_POLICY;To list all created policies:
SHOW NETWORK POLICIES;To inspect the current account-level policy:
SELECT * FROM SNOWFLAKE.ACCOUNT_USAGE.ACCOUNT_PARAMETERS
WHERE parameter_name = 'NETWORK_POLICY';
To check a specific user’s assigned policy:
SHOW USERS LIKE 'jdoe';| Tip | Why It Matters |
|---|---|
| ✅ Always test user-level first | Prevent accidental lockouts |
| ✅ Use CIDR ranges | Simplifies management of large IP blocks |
| ✅ Maintain a changelog of IPs | Auditing and compliance reasons |
| ✅ Combine with MFA and RBAC | Ensures layered security |
- Forgetting to whitelist your own IP: You can lock yourself out of the platform.
- Using private IP ranges: Snowflake only recognizes public IPs.
- Incorrect CIDR formatting: For example,
/33is invalid (max for IPv4 is/32).
Snowflake network policies can be integrated into Infrastructure-as-Code workflows. Using tools like Terraform or Snowflake’s Python Connector, you can version and apply policies in CI/CD pipelines.
Need help writing a Terraform module or script? Just ask.
Configuring network rules in Snowflake isn’t just a one-time task—it’s a critical part of your security posture. By carefully setting up and managing network policies, you reduce attack surfaces and maintain compliance with internal and external security standards.
#Snowflake #DataSecurity #CloudSecurity #NetworkPolicy #DataEngineering #SnowflakeTips #SQLSecurity #RBAC #SnowflakeAdmin